Finding Hidden Costs in Azure
I just received my Azure Bill and for some reason, I have spent $1000 on a firewall but I have no idea which one is costing me so much money, nor do I know why!
I needed a way to find and break down the costs of my Azure Resources and identify any hidden costs and find the costs of resources within the Azure Portal. However, when I tried to do this in the Azure Portal I couldn’t find the cost of my Azure Resources. I couldn’t even just search for my most expensive resource, instead I had to go through every resource group and try and find it that way.
Alternatively there is a 3rd party tool called Tag Manager that has a 2 week free trial and no credit card sign up in the Azure marketplace. You can see more about it here: https://portal.cloudclarity.app
Log into portal.cloudclarity.app, a third-party azure service where you can breakdown the costs of your Azure Bill and easily navigate through to Azure and delete it, or make changes to remove or lower the costs associated.
Once you log into https://portal.cloudclarity.app/tag-manager/cost-picker you can immediately set up a two week trial account. I used this to gain access to the subscription I needed to identify
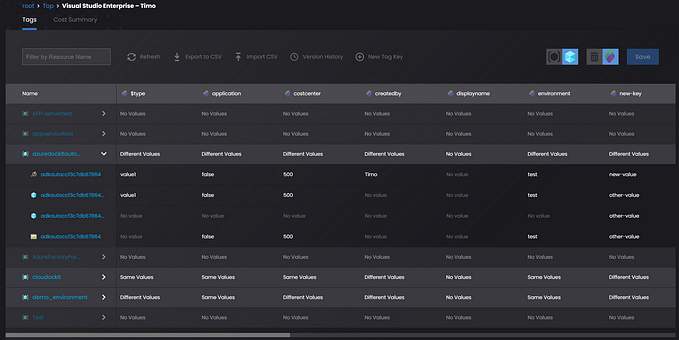
- Click cost summary

2. Select your subscription

3. Choose the Resource View

4. This will list the resources by the most expensive resource type per year. Navigate to the resource type you are looking for. In my case, firewalls.

5. By clicking one of the tags and opening the resource we can naviagate straight to the Azure portal and see this resource.

Clicking to sort by resource and the view is sorted by highest cost per year. I navigated to firewall which had become the highest costing resource I had and found the culprit. The graph shows how much it was costing me and provided me with a clickthrough link to the Azure Portal so that I could delete the expensive resource.
It cost me $1000 in August and September, and it was a test firewall that got released accidentally. If I didn’t use Tag Manager, I might not have caught this for another couple months. For this reason I strongly recommend the use of Tag Manager to find hidden Azure Costs and prepare for my next bill.
In the future I will use the dashboard feature that https://portal.cloudclarity.app allows me track all the resources that I have deployed, simply by tagging them with me as the owner. That way I can catch any unforeseen Azure costs which will ultimately add up over time, before I get the shock of an expensive bill.